Adding a new demand endpoint is a slightly more complex process which will thoroughly be explained in this section. It involves querying and interpreting the response of an XML or JSON feed which you received from your demand partner.
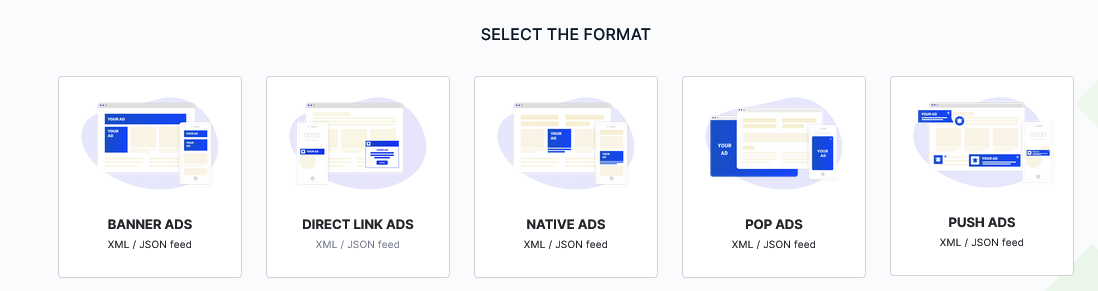
- Select the ad format of the demand endpoint you are adding.
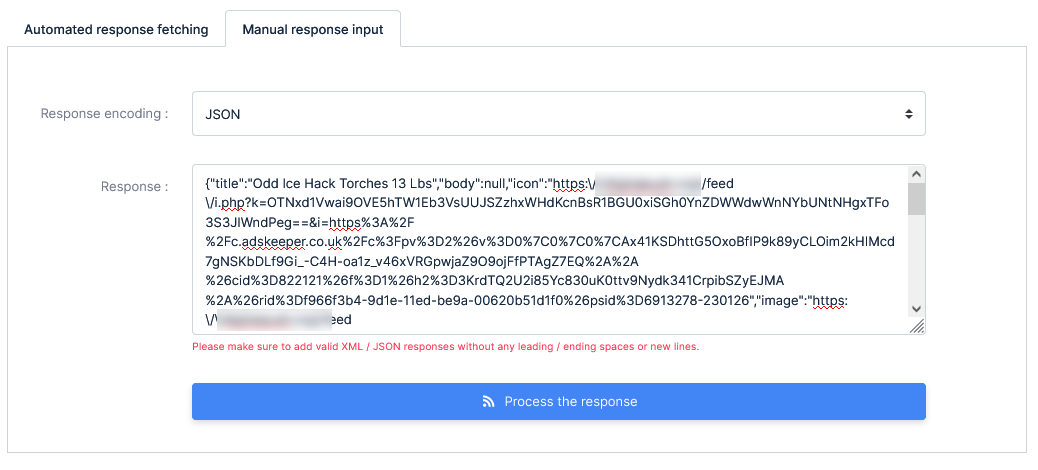
- Copy / Paste the feed URL as received from your demand partner in the textarea with the same name.

- For the interpretation of the feed to be correctly handled, you will need to manually replace the parameters within feed URL with our platform’s parameters.
Important! Please keep in mind that each feed you receive from your demand partners is different and will most likely use different parameters and terminology. Pay close attention when replacing, otherwise your newly added feed will only return errors.
COMPLETE LIST OF AVAILABLE PARAMETERS Parameter Format Description{ip}ALLWill be replaced with the IP address within the request.{ua}ALLWill be replaced with the USER AGENT within the request.{seid}ALLWill be replaced supply endpoint ID as listed within the database.{subid}ALLWill be replaced with the subid as provided by the supply endpoint within the request.{referrer}ALLWill be replaced with the referrer URL as provided by the supply endpoint within the request.{lang}ALLWill be replaced with the language as provided by the supply endpoint within the request.{category}ALLWill be replaced with the IAB category ( if any ) as provided by the supply endpoint within the request. If empty, the category of the supply endpoint’s parent website will be used.{age}PUSHWill be replaced with the subscription age ( unix timestamp ).{size}PUSHWill be replaced with the banner size as provided by the supply endpoint within the request.{today}ALLHelper parameter. Used for refined tracking. Will be replaced with the current date in the format YYYYMMDD - There are 2 available options for fetching the response of the feed you are adding.
Important! Regardless of option you pick, make sure to select the response encoding properly ( XML or JSON ).
- Automated response fetching – the platform will perform a live request to the feed using the parameters inputed in the fields. (Recommended)

- Manual response input – you copy / paste a response from the feed.
- Automated response fetching – the platform will perform a live request to the feed using the parameters inputed in the fields. (Recommended)
- The next step is to select the parameters received in the response of the feed and match them with the platform’s parameters. This is a very important step as well, so please pay close attention when selecting.
Example: In the image below, you will see that the feed response has “description” named as “body”, the “click URL” named as “link” and the “bid” parameter named “cpc”, therefor we select them accordingly.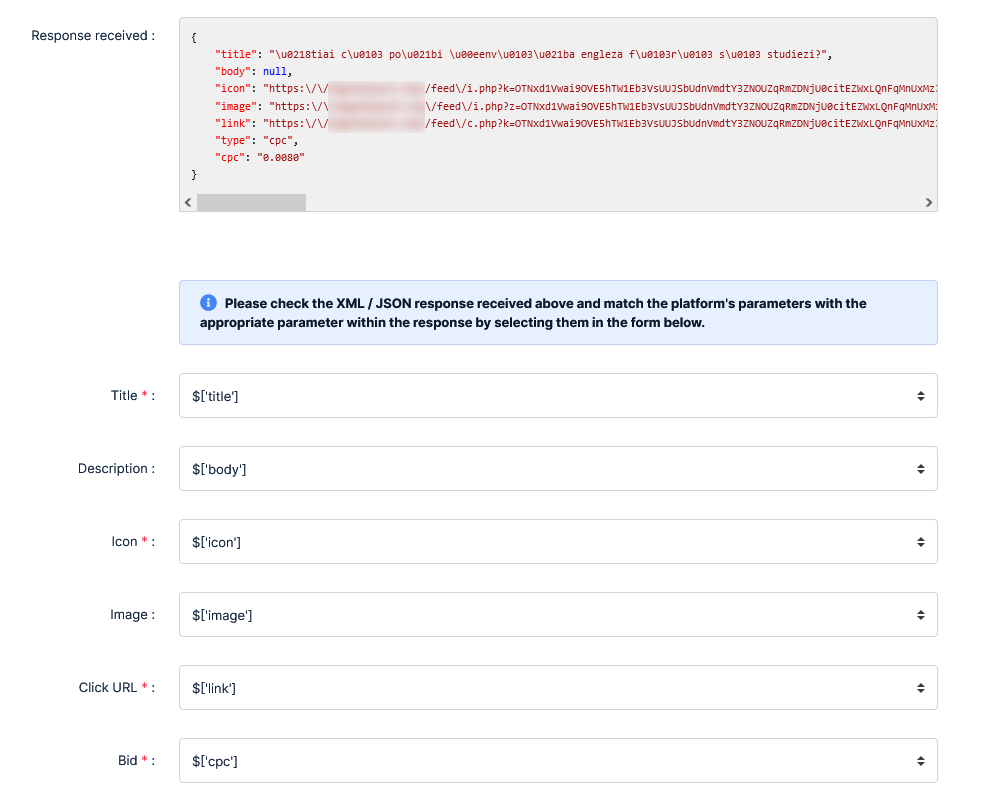
- The last step consists of naming your newly added demand endpoint, setting the budget ( if any ), daily budget limits, selecting the revenue share, throttling and setting the targeting options ( if any ).
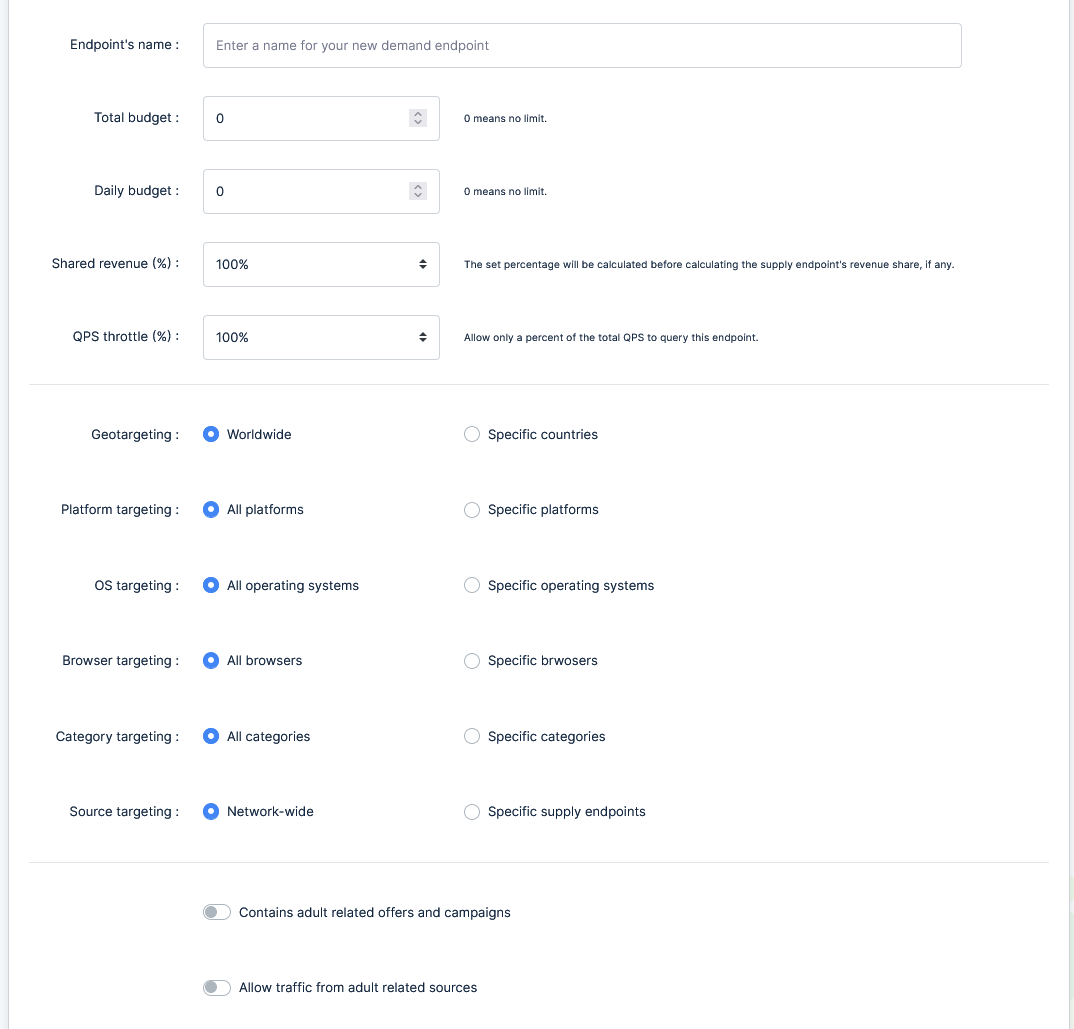
Once submitted, the newly integrated demand endpoint will immediately go live and start being interrogated.